How to Turn Drone Footage Into an Instagram Reel
Picking the Best Clips
If you fly a drone, you probably have a ton of cool shots on your memory card. Going through all of them takes forever. For a Reel, you want clips that grab people right away, in the first second. Short and smooth moves look way better on a phone than a slow pan that takes forever to get good. Also, keep the whole video under ninety seconds so it fits Instagram’s upload limit.
Cropping for Vertical Screens: The Problem
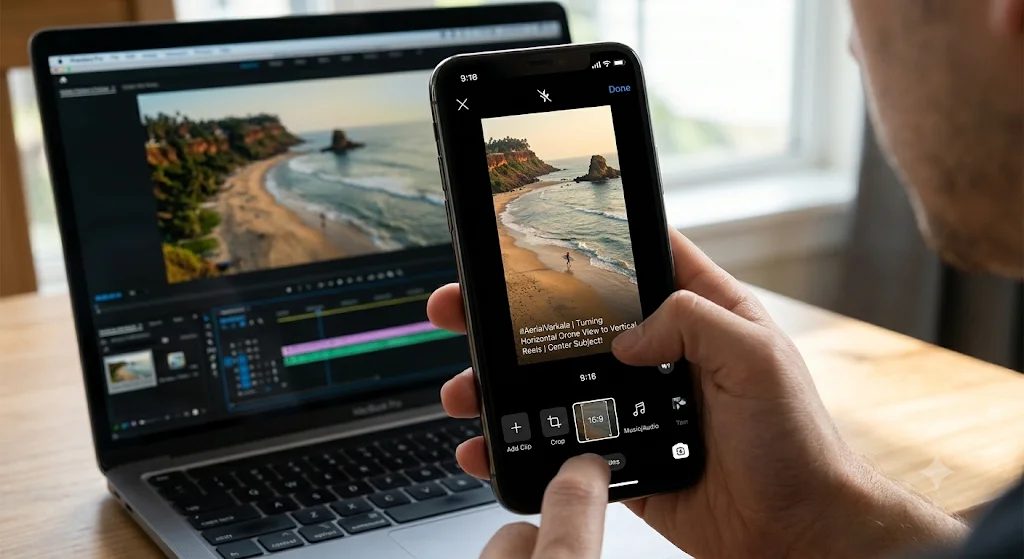
Drones record in wide 16:9 video, but Reels are tall 9:16 so they fill up a phone screen. If you just stretch the video to fit, it looks squished and weird. You have to crop it or reframe it instead.
Cropping for Vertical Screens: Easy Fixes
- Keep your subject in the middle so it doesn’t get cut off when the sides get cropped.
- Use auto-reframe in Premiere Pro or CapCut. It follows your subject and keeps it centered.
- Add keyframes by hand to move the frame left or right across your 4K footage.
Phone Editing vs. Computer Editing: The Phone
You can reframe right inside Instagram by pinching to zoom, and it’s really easy. The problem is that it’s not very exact, and it can make your video look worse. Your 4K footage gets shrunk down, so it can look blurry on newer phones. That’s a big deal if you want your video to look cinematic.
Phone Editing vs. Computer Editing: The Computer
Editing on a computer is different. Premiere Pro’s Auto-Reframe uses machine learning to check every frame and keep your subject in the middle of the tall frame. It needs a stronger computer and can take longer, but your video stays sharp when you export it. So basically, the phone is faster and the computer looks better.
Adding Captions and Audio: Captions
After your video is vertical, you can add text and music. Lots of people watch Reels with the sound off, so captions are pretty much a must if you want people to keep watching.
Adding Captions and Audio: Music
You can pick a trending sound in the Instagram app or add a fun song when you edit on your computer. Just keep your text in the middle of the screen so the like and comment buttons don’t cover it up.
Exporting Your Final Reel
When you finish editing, your export settings matter a lot. If you pick the wrong ones, your nice 4K footage can end up looking pixelated. Export it at 1080 by 1920 and 30 frames per second, using H.264. Try not to make the file too big, so it uploads fast on mobile data and Instagram doesn’t squash the quality. Then put it on your phone, write a good caption with some hashtags, and post it!